

How To Master In Logic Pro X
Mastering with Logic Pro Ten: Amend your Sound with Stride-by-footstep Guide
Mastering a track is the last step before publishing your work. It's a fundamental yet often overlooked aspect of music production, still artists often ignore the importance of achieving industry-standard book levels and overall sounds.
The reality is that a good mastering process can make your sound truly stand out. The role of a mastering engineer is to accept what'due south been recorded and mixed and make it audio more cohesive and (mostly) louder.
To think that mastering a rails means simply raising its volume is a misconception many artists have. Instead, mastering is an art that requires an incredible ear for music, combined with a rare feature in the music manufacture: empathy.
The mastering engineer has the ability to understand the needs and vision of artists, and their knowledge of what the music industry requires makes these audio experts essential yous might besides be interested in learning a fiddling more than in the cosmos of a unique sound.
Today I'll look into Mastering with Logic Pro 10 process, using one of the nigh powerful digital audio workstations in the world. Opting to primary music with Logic Pro X is a fantastic pick, as this workstation offers all the stock plugins you'll e'er demand to create a professional master.
Allow's dive in!
Logic Pro Ten: An Overview

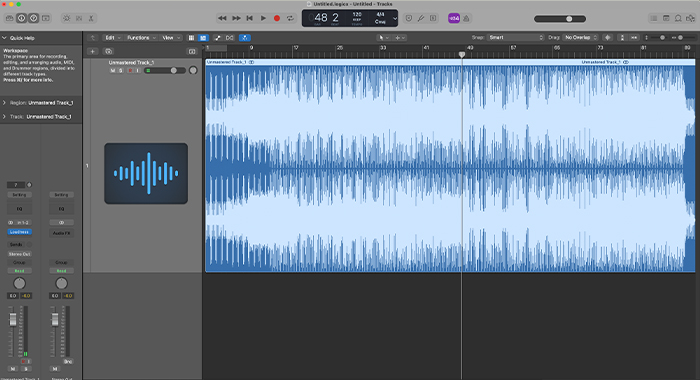
Logic Pro X is a digital sound workstation (DAW) that works exclusively on Apple devices. It'southward a powerful software used by many professionals to record, mix, and primary tracks.
Its affordability and intuitive design make it ideal for beginners, but the tools available within Logic ensure this is software that will satisfy the needs of even the most professional audio engineer.
Mixing and mastering music is where Logic Pro Ten truly stands out, with all the plugins that can make the entire procedure run smoothly and drastically improve your workflow. Incredibly, y'all tin can get Logic Pro 10 for just $200.
What is the Mastering Process?
At that place are three fundamental steps when producing an anthology: recording, mixing, and mastering. While everyone knows, at least approximately, what recording music ways, sound mixing and mastering might be, to laypeople, confusing terms.
Mastering is the final affect to your track, a necessary footstep that volition improve the audio quality and make it set for distribution.
When you record an album, each musical instrument is recorded separately and volition appear in a separate track of your DAW.
Mixing ways taking each track and adjusting the volumes throughout the song so that the overall feel of the rail is the one the artist envisions.
Next comes the mastering session. Mastering engineers receive the bounced mixdown (more on that later) and will piece of work on the overall audio quality of your track to ensure it sounds bang-up on all platforms and devices.
Subsequently in the article, we'll find out more about how mastering engineers accomplish this.
Is Logic Pro X Skillful for Mastering?
Mastering music on Logic Pro X is unproblematic and constructive. The stock plugins you become when buying your copy of Logic Pro X are more enough to achieve skilful mastering.
There are dozens of tutorials on how to brand the most of Logic's free plugins when mastering, my favorite i being this tutorial by Tomas George.
Overall, in that location'due south no huge difference between mastering with Logic and other popular DAWs like Ableton or Pro Tools.
The main difference lies in the cost: if you're on a budget, Logic Pro X provides you lot with everything you lot need at a price much lower than the competition.
Yet, if yous don't have a Mac, is it worth getting an Apple tree product just to use Logic Pro 10? I'd say no.
Although Logic Pro 10 is peachy for mastering, in that location are plenty of similar DAWs that provide professional results on Windows products without investing a yard dollars on a new MacBook.
How exercise I Brand a Master Track in Logic Pro X?
Nosotros'll start with some general suggestions equally to how yous should ready yourself earlier mastering a track.
These are fundamental steps that will assistance you lot achieve a professional audio, and about of all, understand whether a professional result is possible at all with the mixdown you have. After that, we'll look into all the plug-ins you should use to heighten your audio.
The furnishings below are listed in the social club I employ when I primary a rail: there are no rules in the plug-ins' order, and then in one case you lot feel confident enough, you should definitely try to apply them in a different order and run across if it has a positive touch on on your audio and production process.
For the purpose of this commodity, I'll focus exclusively on what I believe are the most fundamental effects. But before nosotros go any further, you might also exist interested in learning a piffling more about Flex Pitch in Logic Pro 10 and how it can improve your mastering procedure.
Sound mastering is an art, then my proffer is to first by learning these essential tools and and so expand your sonic palette with new plug-ins and combinations of furnishings.
-
Evaluate Your Mix
Making sure your mix sound is fix for mastering should be the commencement thing you do before you sit down down and do your mastering magic. Let's take a look at what we need to look at when we clarify the sound product we're about to primary.
If you lot're working on your own mixes, information technology might be specially difficult to evaluate your final mix and scrutinize your mixing process. However, this is fundamental, and past ignoring a bad mix, you'll compromise the last result of your mastered files.
Just like mastering, mixing is an art that requires patience and dedication, only it's necessary for people who are making music regularly.
Reverse to a mastered track, mixing engineers tin listen to individual tracks and adjust each one of them independently.
This major difference gives them more command, just also a bigger responsibility in delivering sound that sounds perfect across all audio frequencies.If you're making music and relying on a mixing engineer for your tracks, don't be afraid to transport them back if there's something yous don't like about the style they sound.
Adjusting tracks' frequencies during the mastering phase can be a daunting task and something a mixing engineer could do much more hands, given they have access to the individual tracks.
-
Await for Audio Imperfections
Listen to the entire track. Practise yous hear clippings, distortions, or any other audio-related issues?
These problems can be stock-still only during the mixing stage, so if you detect problems in the track, yous should get dorsum to the mix or send it back to the mixing engineer.
Remember that, unless you lot're the vocal's creator, you're not supposed to evaluate the track from a music quality point of view but merely from the audio perspective. If you call up the song sucks, y'all shouldn't let your stance affect the mastering process.
-
Sound Peaks
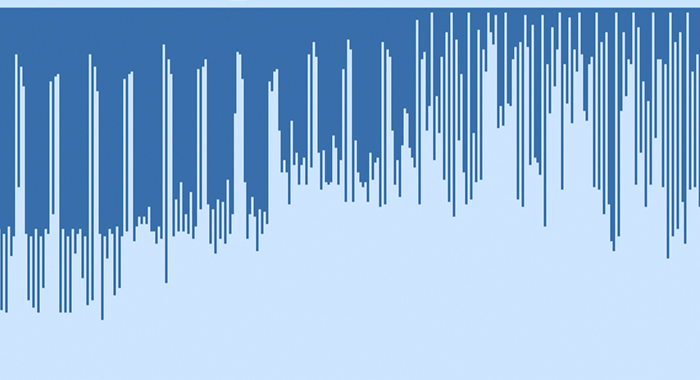
When you receive a mixdown from the recording studio or mixing engineer, the first matter to exercise is to check the sound peaks to ensure you have enough headroom to add together your chain of furnishings.
Audio peaks are the moments of the song when information technology is the loudest. If the mixing was done by a professional, you'd find the headroom to exist somewhere between -3dB and -6dB.
This is the industry standard within the audio customs and gives you lot enough of space to enhance and better sound.
-
LUFS
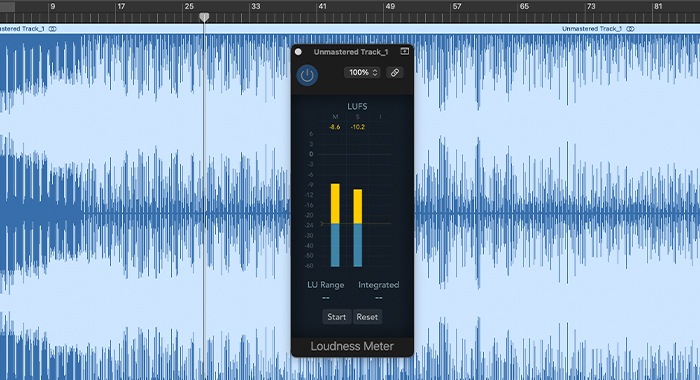
A term that'due south become popular in recent years is LUFS, the acronym for Loudness Units Full Calibration.
Substantially, LUFS is a unit of measurement of a song'due south loudness which is not strictly connected to decibels.
Information technology focuses mostly on the perception of certain frequencies by the man hearing and evaluates the book based on how we humans perceive it rather than the "simple" loudness of a track.
This boggling evolution in audio production led to some significant changes in the audio normalization for Television set and movies and music. Permit'due south focus on the latter.
The music uploaded on YouTube and Spotify, for case, is at -fourteen LUFS. Roughly, this is 8 decibels lower than the music y'all'll detect on a CD. Still, given the loudness levels are carefully-tailored according to humans' needs, the songs don't feel quieter.
The loudness meter is present in about plug-ins, and it'll both measure out loudness and quality of your audio as y'all make the adjustments. Use the loudness meter to achieve optimal results from the streaming platform where you'll upload your music.
Given the importance of these two music platforms, you should exercise the best y'all can to avoid this situation.
-
Reference Track
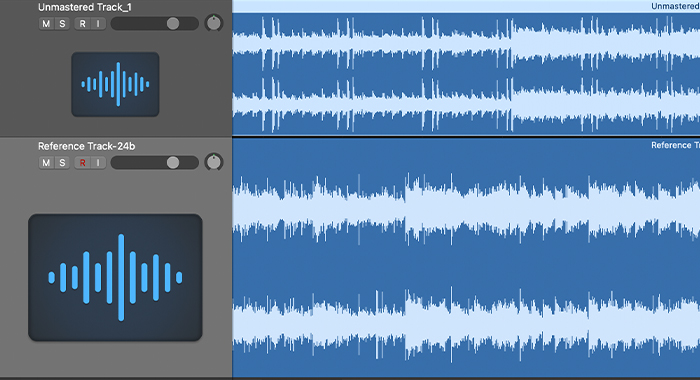
"If I had viii hours to master a song on my DAW, I'd spend six listening to the reference track."
(Abraham Lincoln, supposedly)
Regardless of whether you're mastering your own music or someone else's, you should always take reference tracks to get a clear understanding of the sound you lot aim to achieve.Reference tracks should be of a similar genre to the music yous're working on. It'd also be platonic to have every bit reference tracks songs that had a recording process identical to the one you lot're well-nigh to master.
For instance, if the guitar part in the reference tracks was recorded five times but only one time in your runway, then achieving a like sound will be incommunicable.
Choose your reference track wisely, and y'all'll save yourself fourth dimension and unnecessary struggle.
-
EQ
When equalizing, you lot mitigate or remove sure frequencies that may touch on the overall balance of your audio. At the same time, yous heighten the frequencies you want in the spotlight to ensure the final result sounds clean and professional person.
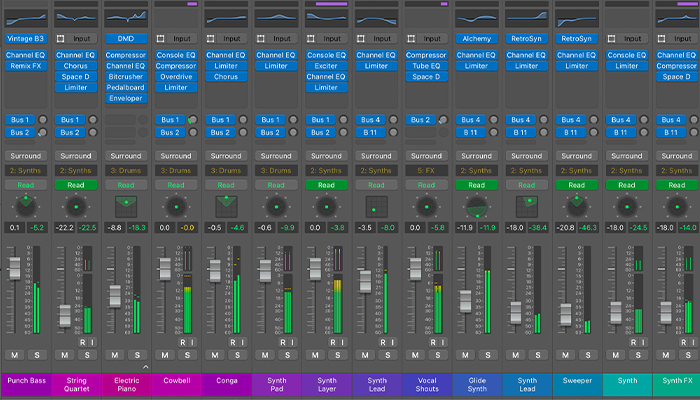
In Logic Pro, there are two types of linear EQ: channel EQ and vintage EQ.
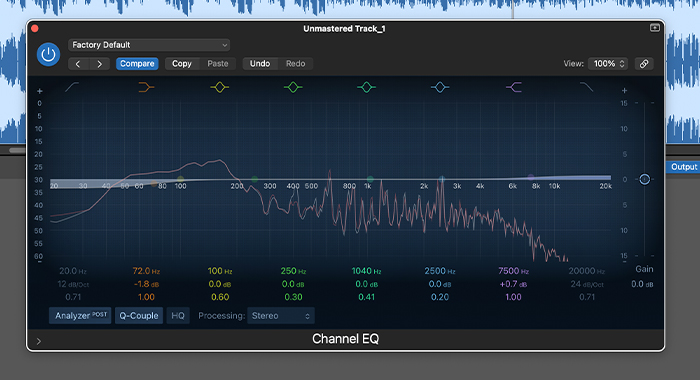
The channel EQ is the standard linear eq on Logic Pro and does wonder. For example, y'all tin make surgical adjustments at all frequency levels, and the plug-in guarantees optimal transparency.
The vintage EQ drove is ideal when you want to add a bit of color to your master. This collection replicates sounds from analog units, namely the Neve, API, and Pultec, to give a vintage experience to your track.
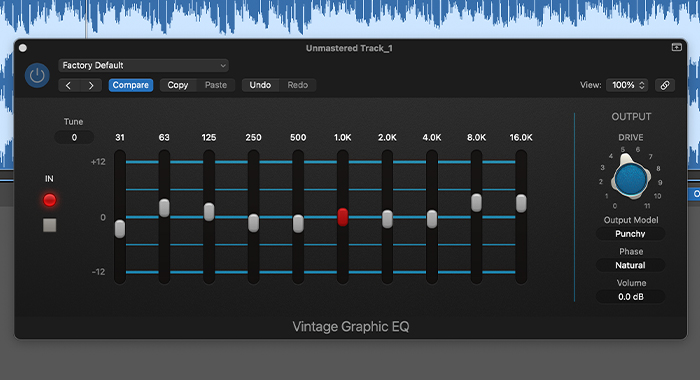
The vintage EQ plug-in features a minimal pattern that makes information technology extremely simple to arrange frequency levels without overdoing information technology.
My recommendation would exist to master the channel EQ first and then give it a try at the vintage collection when you're ready to add together additional color to your masters.
When using a linear EQ, don't make sharp changes in the audio, simply maintain a broad Q range to ensure the transitions experience smoothen and natural. You shouldn't cut or boost frequencies more 2dB, as overdoing information technology will take an impact on the vocal's feel and authenticity.
Depending on the genre you're working on, you might want to give an extra heave to the lower frequencies. However, don't forget that enhancing college frequencies will add clarity to the song, and over-amplifying the lower frequencies will make your master sound dingy.
-
Multiband Compression
The next step in your chain of effects should exist the compressor. Past compressing your master, you'll reduce the gap between louder and quieter parts within the audio file, making the song sound more coherent.
There are a plethora of multiband compression plug-ins available on Logic Pro 10, so all you lot need to do is cull the gain plugin that best suits your genre and starting time adjusting the frequencies.
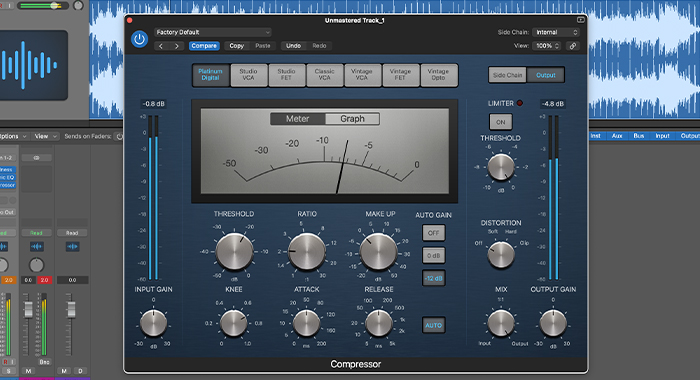
Since all these different compressors may sound disruptive at first, I advise yous get-go with Logic'due south compressor called Platinum Digital, which is Logic's original gain plugin and is the easiest to use.
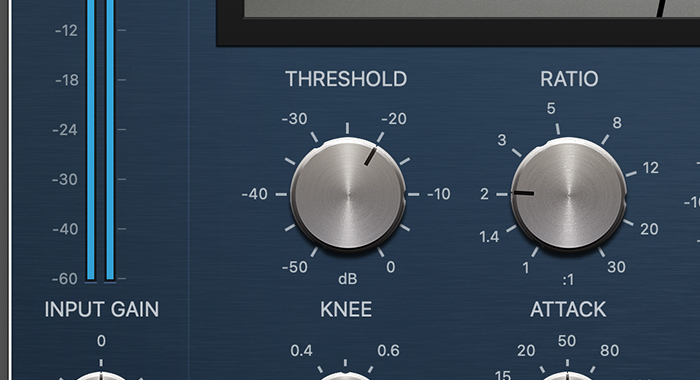
The threshold knob is what you need to focus on the nigh equally it defines when the compressor will activate and start affecting the audio rail. Increase or decrease the threshold value until the loudness meter shows a gain reduction of -2dB.
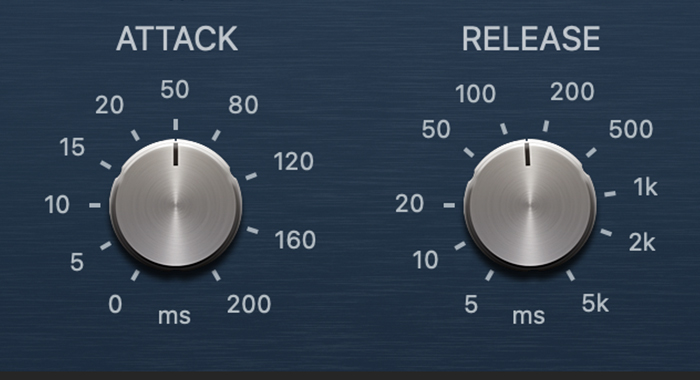
The attack and release knobs allow y'all to adjust how quickly the plug-in will start/end working. Equally a rule of thumb, keep the assail anywhere between 35 and 100ms, and the release anything between 100 and 200ms.
Nevertheless, you'll need to use your ears and determine the best course of activity for your rails, depending on the genre y'all're working on and the effect you want to achieve.
When listening for the compressor'southward bear on on your runway, listen to the vanquish or the snare drum to ensure the release settings aren't affecting their impact. Aside from that, you should just continue trying until you achieve the optimal outcome.
Bear in heed that, one time again, existence subtle is advised: even though reducing the dynamic range will make your vocal sound more consequent, if non done properly, information technology'll also make information technology audio unnatural.
-
Stereo Widening

For some music genres, adjusting stereo width volition add together incredible depth and color to the master. However, in general, this effect is a double-edged sword every bit it can compromise the overall frequency balance you have created so far.
Enhancing the overall stereo prototype volition create a "alive" consequence that will bring recorded music to life. In Logic Pro X, the Stereo Spread plug-in volition do a fantastic job at spreading your frequencies out.
The bulldoze knob of this plug-in is sensitive but extremely intuitive, so make adjustments until you lot're happy with the stereo width you achieved on your music, but brand certain yous keep it to a minimum.
When applying stereo imaging, you should avoid affecting low frequencies, so make sure y'all set the lower frequency parameter to 300 to 400Hz.
-
Limit
For most mastering engineers, the limiter is the last plugin in the mastering chain for good reason: this plug-in takes the sound you created and makes information technology louder. Similar to a compressor, a limiter increases the perceived loudness of a track and takes it to its volume limit (hence the name).
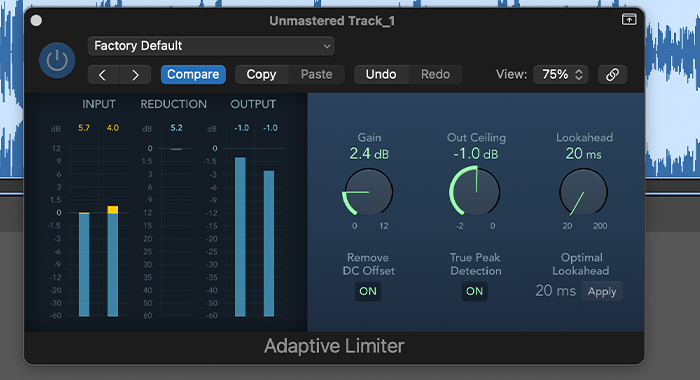
In Logic Pro X, you have a limiter and an adaptive limiter at your disposal. While with the former, you'll have to do nearly things yourself, the 2nd i will analyze and adapt the limits throughout the audio track, depending on the audio peaks in the audio point.
In full general, by using the adaptive limiter, y'all'll exist able to achieve a more natural audio, as the plug-in can automatically identify the loudest value for each section of the track.
The adaptive limiter plug-in on Logic Pro Ten is straightforward to use: once you upload it, you'll have to prepare the out ceiling value to -1dB to ensure the track won't be clipping.
Side by side, adjust the gain with the chief knob until you reach -14 LUFS. In this terminal phase of mastering, it's fundamental to mind to the track in its entirety and multiple times. Can you hear whatsoever clippings, distortions, or unwanted sounds? Take notes and adjust the plug-in chain if necessary.
-
Export
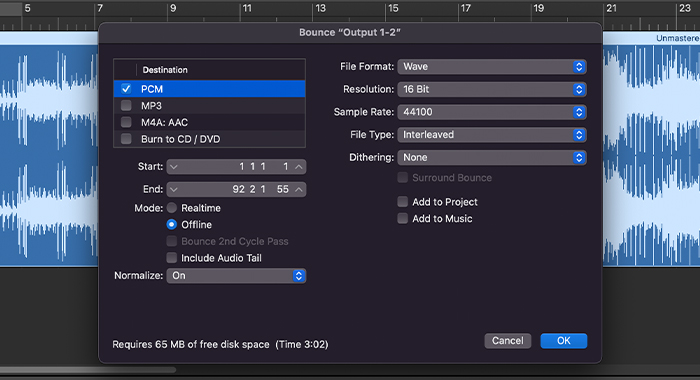
Now, your track is gear up to be exported and shared with the rest of the world!
The final bounce should exist a mastered version of the rail that'due south prepare for publication, which means the audio file should contain the highest possible level of information.
Therefore, when exporting a mastered track, yous should ever opt for the post-obit settings: 16-bit equally bitrate, 44100 Hz as sample rate, and export the file as WAV or AIFF.
For more than information, you lot can cheque out our recent article What is an Audio Sample Rate and What Sample Charge per unit Should I Record at.
If you lot were using a college bitrate while mastering the rails, you'd need to apply the dithering to your runway, which will ensure the piece won't lose quality or quantity of information fifty-fifty if the bitrate is lowered past adding low-level dissonance.
What dB is All-time for Mastering?
When yous main music, you should have enough headroom to add together plug-ins that'll raise your audio.
A headroom between 3 and 6dB is generally accustomed (or required) by a mastering engineer.
Dissimilar platforms have different targets, only since nosotros alive in a Spotify-governed music system, you should adjust your loudness co-ordinate to the current most pop platform.
Therefore, the stop event should be -14 dB LUFS, which is the loudness accepted past Spotify.
Final Thoughts
I hope this article helped you become a better agreement of what information technology takes to master a track on Logic Pro X.
Although the initial results may not exist as practiced as you hoped, the more y'all use this DAW to main songs, the easier it'll become. Eventually, yous might need more plug-ins to achieve the optimal audio yous envision.
Nevertheless, let me reassure you the costless plugins that come up with Logic Pro 10 should be able to satisfy your needs for a long time, regardless of the musical genre you're working on.
If you primary music regularly inside Logic, you'll realize that a adept mix is crucial.
You can't rely solely on the mastering effects provided by Logic to fix issues that should have been dealt with previously.
Before publishing a track, remember to:
- Measure out perceived loudness with the appropriate meter. If yous don't measure out loudness before publishing a rails, some streaming services might reduce its perceived loudness automatically and compromise your track.
- Select the appropriate flake depth and sample rate.
- Bank check the loudest office of your song and make sure there's no clipping, distortion, or unwanted dissonance.
When you feel ready, yous can also cull a mastering course among the dozens available for logic users and upgrade your knowledge in mastering music.
If yous do that, effort to master the same tracks once again and run into how much your skills improved. Yous'll exist amazed by the good investment you made in your career!
Having more cognition as to what a good chief requires will give you lot more than command over the last audio result.
Furthermore, it'll give y'all all the necessary data to make the most of EQ, compression, gain, and all the other fundamental tools y'all demand to bring to life music that'south ready to exist released worldwide.
Good luck, and stay creative!
FAQ
How loud should a mix be earlier mastering?
As a rule of thumb, yous should leave between three and 6dB Superlative, or around -18 to -23 LUFS, for the mastering process to have enough headroom. If your mix is also loud, the mastering engineer won't have enough room to add effects and piece of work on audio levels.
How loud should a master exist?
A loudness level of -14 LUFS will run into the needs of most streaming platforms. If your master is louder than this, chances are your vocal will exist altered when y'all upload it on streaming platforms like Spotify.
How tin you make a mix sound skilful on all devices?
Listening to your mix on dissimilar speaker systems, headphones and devices will give you lot a clearer understanding of how your vocal actually sounds.
Studio monitors and headphones will provide yous with the transparency y'all need to edit your track professionally; however, try to listen to your mix on cheap headphones or from your phone's speakers to experience how coincidental listeners might heed to your music.
Source: https://crumplepop.com/mastering-with-logic-pro-x/
0 Response to "How To Master In Logic Pro X"
Post a Comment